Why You’ll Love This Squaw Bread Recipe
When you try this Squaw Bread recipe, you’ll quickly discover why it’s a favorite. The rich, nutty flavors from the combination of whole wheat, rye, and bread flours create a delightful, hearty texture.
Plus, the addition of golden raisins adds a touch of sweetness that perfectly balances the earthy tones. I love how this bread makes my kitchen smell amazing as it bakes.
Whether you enjoy it fresh out of the oven or toasted with butter, each slice offers a comforting taste that’s hard to resist. Trust me, once you try it, you’ll want to make it again and again!
Ingredients of Squaw Bread
When it comes to making Squaw Bread, the ingredients play a crucial role in creating that unique flavor and texture we all love. You’ll find a delightful mix of flours, sweeteners, and even some secret ingredients that you mightn’t expect. Each element works together to create a wholesome bread that’s perfect for toasting, slathering with butter, or even making a sandwich.
So, let’s dive right into what you need to whip up this delicious loaf.
Here’s a list of what you’ll need for the Squaw Bread recipe:
- 1/2 cup golden raisins (may be pureed)
- 1 teaspoon sugar (for proofing the yeast)
- 1 cup water (distilled or mineral, not tap)
- 2 cups bread flour
- 1 cup rye flour
- 1 cup whole wheat flour
- 2 tablespoons honey
- 1/2 tablespoon caramel coloring
- 1/4 cup crucial wheat gluten
- 1/8 cup dark brown sugar
- 1/4 cup non-fat powdered milk
- 1/3 cup soybean oil
- 1 teaspoon salt
- 1 teaspoon active dry yeast (NOT rapid rise)
Now, before you rush off to gather these ingredients, let’s chat a bit about a few considerations.
First, using distilled or mineral water is key—trust me, tap water can throw off the yeast and ruin your loaf.
And if you’ve never used crucial wheat gluten before, don’t worry; it’s just a fancy name for a little extra protein that helps give the bread its chewy texture.
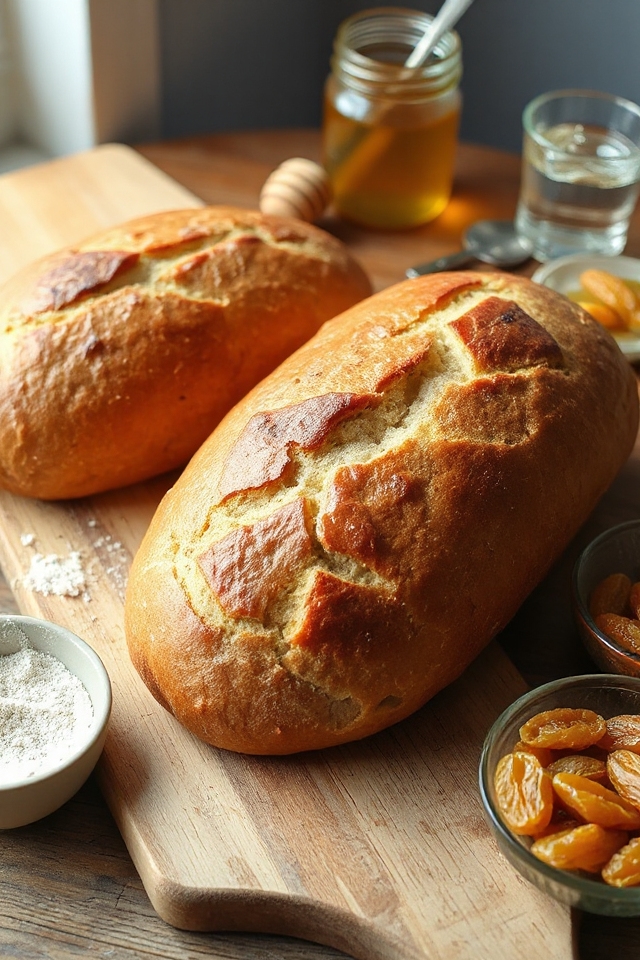
The golden raisins are also a fun twist; you can puree them for a smoother texture or leave them whole for delightful bursts of sweetness.
Plus, don’t skimp on the kneading; it’s not just a workout for your arms, it’s essential for developing that lovely gluten structure.
How to Make Squaw Bread
Making Squaw Bread is a delightful process that marries patience with creativity. To start, grab 1/2 cup of golden raisins and mix them with 1 cup of distilled or mineral water. Now, here’s where the magic begins: let those little nuggets sit overnight to plump up. It’s like giving them a cozy spa day. If you’re feeling adventurous, you can puree them the next day for a smoother texture, but if you prefer those sweet bursts of flavor, leave them whole.
Next, let’s get that yeast activated. In a small bowl, combine 1/4 cup of warm water (make sure it’s between 100° and 110° to avoid a yeast disaster) with 1 teaspoon of sugar. Sprinkle in 1 teaspoon of active dry yeast—definitely not the rapid rise kind, or you’ll be left with a flat disappointment. After about 10 minutes, it should be bubbly and foamy, looking all excited to work.
Now, in a large mixing bowl or stand mixer, combine 2 cups of bread flour, 1 cup of rye flour, 1 cup of whole wheat flour, 1/4 cup of essential wheat gluten, 1/4 cup of non-fat powdered milk, and 1 teaspoon of salt. Make a little well in the center and pour in your raisin mixture, the yeast, 2 tablespoons of honey, 1/8 cup of dark brown sugar, and 1/3 cup of soybean oil. Mix it all together until it’s a cohesive dough.
Time to knead! This is the fun part where you can feel like a bread-making pro. If you’re using a stand mixer, let the dough hook do its thing for about 7 minutes. If it’s feeling a little sticky, don’t be shy to add more flour until it starts to pull away from the sides of the bowl.
Once it’s all beautiful and smooth, transfer it to a greased bowl, cover it, and let it rise until it doubles in size. After that, give it another quick knead to punch it down, shape it into two loaves, and place those beauties into greased 8 X 5 X 4 loaf pans. Let them rise a second time until they’re puffed up—just like your expectations for your favorite TV show finale.
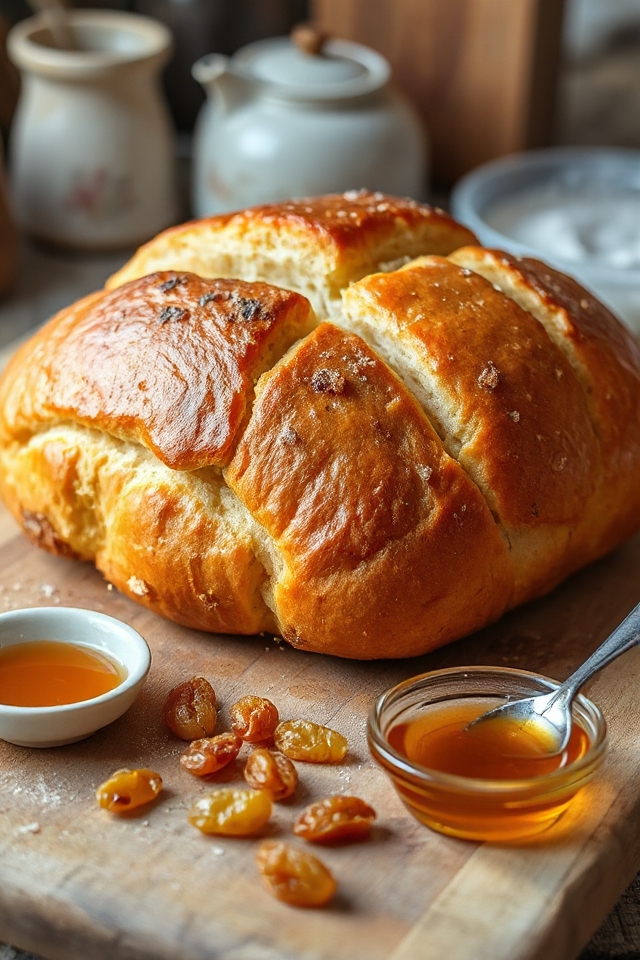
Finally, bake them at 350°F for about 30 minutes or until they’re golden brown and sound hollow when tapped. Cool them on a wire rack before slicing into that glorious loaf, and just like that, you’ve created your very own Squaw Bread. Isn’t baking a little bit of magic?
Squaw Bread Substitutions & Variations
After you’ve mastered the art of making Squaw Bread, you might find yourself wanting to experiment with different flavors and ingredients.
I love swapping out the raisins for dried cranberries or chopped dates for a unique twist. You can also try adding seeds like sunflower or pumpkin for extra crunch.
If you’re looking for a sweeter loaf, consider incorporating spices like cinnamon or nutmeg.
For a gluten-free version, substitute the flours with gluten-free blends, but keep an eye on the texture.
Whatever you choose, don’t hesitate to get creative and make this recipe your own! Enjoy the journey!
Additional Tips & Notes
Although baking Squaw Bread can seem intimidating at first, a few extra tips can make the process smoother and more enjoyable.
First, make certain your ingredients are at room temperature to guarantee better mixing. I also recommend using high-quality flours for supreme flavor and texture.
Don’t rush the rising times; patience is key for that perfect loaf. If the dough feels sticky, sprinkle a little extra flour while kneading.
Finally, let the bread cool completely before slicing to avoid a gummy texture. Trust me, these small adjustments can elevate your baking experience and result in delicious Squaw Bread!