Why You’ll Love This Gluten Free Pumpkin Bread Recipe
If you’re looking for a deliciously moist and flavorful treat, you’ll love this gluten-free pumpkin bread recipe. It’s perfect for fall, but honestly, I enjoy it year-round.
The combination of spices and pumpkin creates a warm, inviting aroma that fills my kitchen. Plus, it’s incredibly easy to make, even for beginners.
I appreciate how it’s gluten-free, so I can share it with friends who’ve dietary restrictions. Each slice is rich and satisfying, especially with a cup of coffee.
Trust me, once you try it, you’ll be hooked on this delightful bread!
Ingredients of Gluten Free Pumpkin Bread
When it comes to baking, there’s something truly magical about the scent of pumpkin bread wafting through the house. It’s cozy, comforting, and just brings a smile to your face, doesn’t it?
This gluten-free pumpkin bread recipe is loaded with flavor and moisture, making it a perfect treat for any time of the year—though I’ll always have a soft spot for it in the fall. The ingredients are simple, and you might even have some already hanging out in your pantry. Let’s take a look at what you’ll need to whip up this delightful bread.
Ingredients for Gluten Free Pumpkin Bread:
- 4 cups gluten-free flour
- 2 teaspoons cinnamon
- 2 teaspoons baking soda
- 1 teaspoon baking powder
- 1 1/2 teaspoons salt
- 2 teaspoons xanthan gum or guar gum
- 1/2 teaspoon ground cloves
- 1 teaspoon allspice
- 1 teaspoon nutmeg
- 1 cup white sugar
- 2/3 cup brown sugar
- 15 ounces pumpkin puree (like Libby’s)
- 4 large eggs
- 1/4 cup canola oil
- 1 cup unsweetened applesauce
- 1 cup nonfat milk
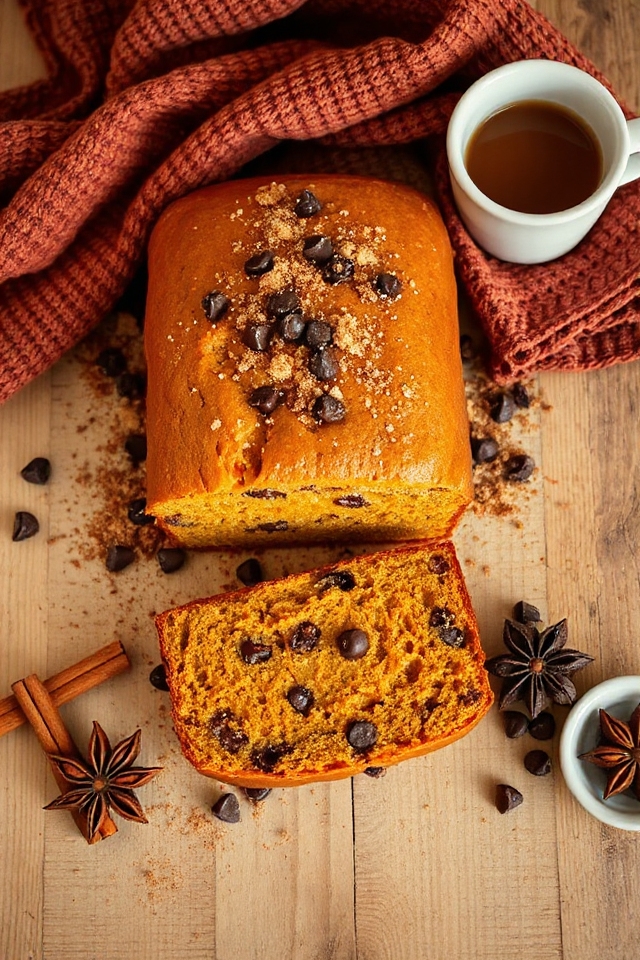
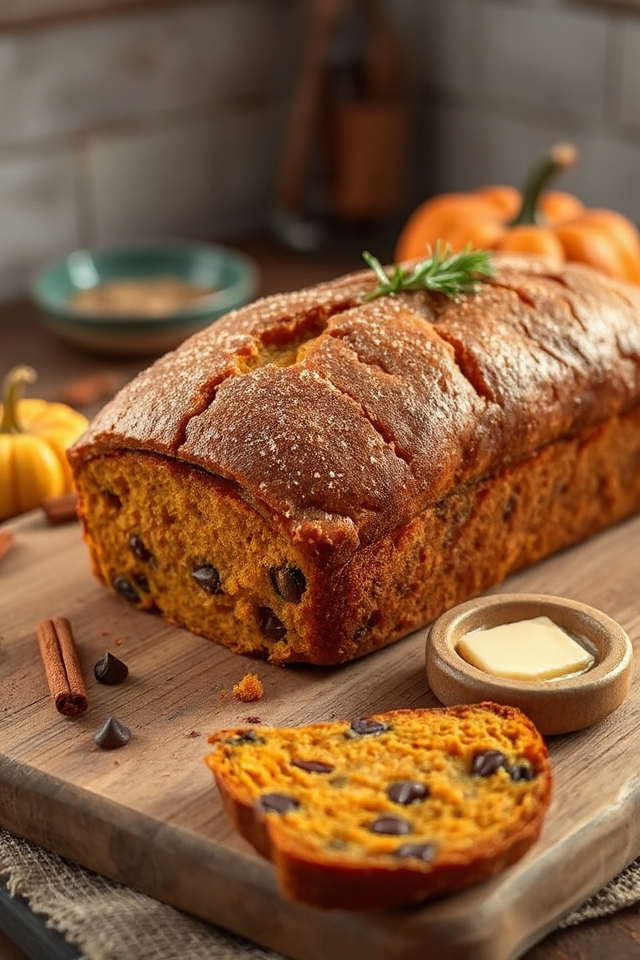
- 1 1/2 cups semi-sweet chocolate chips (optional, but why not?)
Now that we’ve got our ingredients lined up, let’s chat about a couple of considerations. Make sure your gluten-free flour blend is a good quality one. Not all blends are created equal, and some can lead to a dense loaf.
Also, remember that xanthan gum or guar gum is essential for giving the bread that lovely structure. If you’re like me, you might sometimes forget to check if you have enough of it on hand, and let me tell you, a loaf without it’s like a party without cake—just not the same.
And if you’re feeling adventurous, switch up those chocolate chips for nuts or even dried fruit for a different twist. The world is your pumpkin bread oyster, so have fun!
How to Make Gluten Free Pumpkin Bread
Alright, let’s plunge into the delightful process of making your gluten-free pumpkin bread. First things first, grab a very large mixing bowl—trust me, you’ll need the space—because we’re about to whip up some magic. Start by cracking 4 large eggs into that bowl, and beat them until they’re light and frothy. This is your base, your foundation if you will, so give it a good whisk.
Next, add in 1 cup of white sugar, 2/3 cup of brown sugar, 15 ounces of pumpkin puree (I always go for Libby’s; it’s like the gold standard of pumpkin), 1 cup of unsweetened applesauce, and 1/4 cup of canola oil. Mix it all up until everything is well combined. You want it to be smooth and creamy—just picture a lovely autumn day and let that inspire you.
Now, it’s time to introduce the dry ingredients. In a separate bowl, whisk together 4 cups of gluten-free flour, 2 teaspoons of cinnamon, 2 teaspoons of baking soda, 1 teaspoon of baking powder, 1 1/2 teaspoons of salt, 2 teaspoons of xanthan gum (or guar gum if that’s your jam), 1/2 teaspoon of ground cloves, 1 teaspoon of allspice, and 1 teaspoon of nutmeg. This mix is where all the flavor magic happens.
Once that’s ready, gradually add half of this dry mixture into your wet ingredients, beating it in until it’s combined. Then, add the rest of the dry mix, and slowly pour in 1 cup of nonfat milk. Keep mixing until there are no flour lumps hanging around. If you’re feeling extra indulgent, now’s the time to fold in 1 1/2 cups of semi-sweet chocolate chips. Who can say no to a little chocolate, right?
Now comes the fun part—pouring that luscious batter into your greased and floured small loaf pans. You’ll want to fill them about 2/3 to 3/4 full since they’ll rise while baking. It’s like watching a little bread magic happen.
Before you pop them into your preheated 350-degree oven, sprinkle a little brown sugar and cinnamon on top of each loaf. It’s like giving them a sweet little hat. Bake them for about 40-45 minutes, but keep an eye on them. You know the drill: a toothpick should come out clean when they’re done.
If you’re making muffins instead, they’ll only take about 30-35 minutes. And just like that, you’ve got yourself some delicious gluten-free pumpkin bread that will make your house smell like a cozy bakery. Enjoy every bite, and don’t forget to share—if you can resist the temptation!
Gluten Free Pumpkin Bread Substitutions & Variations
After whipping up that delightful gluten-free pumpkin bread, you might be wondering how to customize it to fit your taste or dietary needs.
I love swapping out the sugar for maple syrup or honey for a natural sweetness. For a nutty twist, try adding crushed walnuts or pecans.
If you’re looking for a dairy-free option, almond milk works beautifully in place of nonfat milk. Want more spice? Toss in extra cinnamon or a pinch of ginger.
And if chocolate isn’t your thing, dried cranberries or raisins add a nice touch. These simple substitutions can make your pumpkin bread uniquely yours!
Additional Tips & Notes
While baking gluten-free pumpkin bread can be a rewarding experience, there are a few additional tips that can enhance your results.
First, make certain your ingredients are at room temperature; it’ll help everything blend smoothly. I also recommend using a kitchen scale for precise measurements, especially with gluten-free flour.
Don’t skip the sprinkle of brown sugar and cinnamon on top—it adds a delightful crunch!
Finally, keep an eye on the baking time; ovens vary, and you don’t want to overbake it. Let the loaves cool completely before slicing to guarantee they hold together beautifully.
Happy baking!